For some odd reason the Naza v2 is not working out. I even tested it on my Y6 and it works perfectly. I do not feel like ripping all the electronics and starting over again. I did some quick fix like shorten the motor leads and added a EM filter from the ESC to the flight controller. And now everything works great. I still ditched the Naza M because I bought a DJI Wookong M with a v2 GPS and v2 IMU for RCG. It was an okay deal for needing something better, I got it for $480. I guess it is not too bad since it still sell for $1000 new. And the v2 IMU is another $240 upgrade.
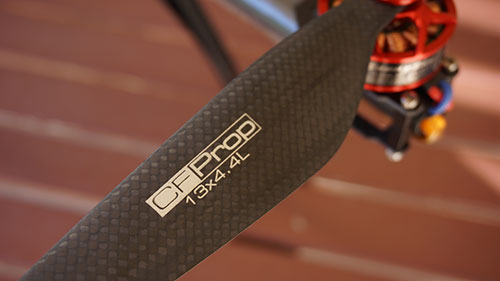
I also switch to the best carbon fiber prop you can buy, T-Motor 13x4.4. Yes these are very expensive compared to gemfan, tarot, or any other brands. Right out of the box the T-Motor prop is well balanced and ready to be used. The most important thing of all, it has the best flight time. This is one of those things you have to see in person. Unlike some of the cheaper brands this props actually has a shape to it. It's not just a think piece of carbon fiber angled to a certain pitch. If you think your cheap carbon fiber props are stiff, wait until your try bending these props. A brand new set of these props will cost you $64.99 for a pair, but I was lucky enough to get 2 pair of used ones for $60.
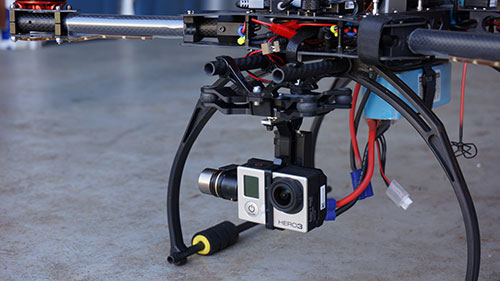
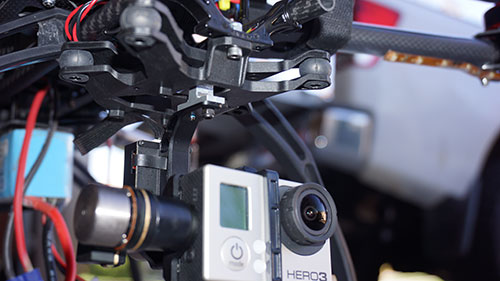
I did not have much luck or patients tuning my Tarot T2-D gimbal so I bought a used H3-2D gimbal from RCG for $145. The gimbal came with a GCU so it will work with any DJI flight controller but you will need to find a way to mount it to your frame.
I took the gimbal dampening mount from my Tarot T2-D and used it on H3-2D.
In order to use the Tarot T2-D dampener, I had to make a little adapter that connects the two together. The part is made out of 6061 aluminum and looks like a little H.
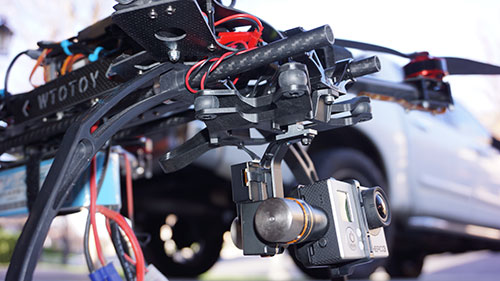
Can you see the small silver part on the bottom side of the gimbal dampener? That is the aluminum adapter.
Since I was using a iOSD, BTU and GCU I did not have enough ports to plug in so I had to get a CAN HUB.

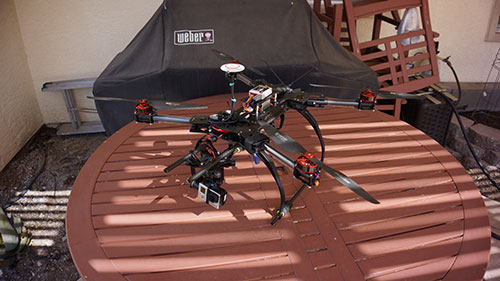
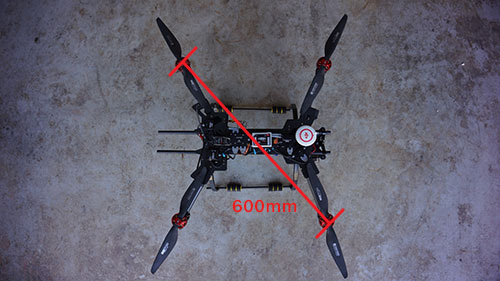
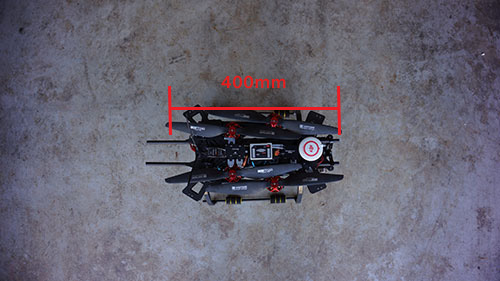
Open of the main reason why I like this frame so much is how I can fold the arms inward. Unlike a lot of the frames the arms fold outwards. It will make it smaller in diameter but still very long. With this frame it once had a 600mm diameter (from motor center to center diagonally) and shrinks down to about 400mm (at the longest points)
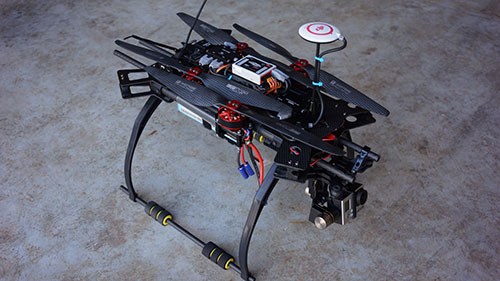
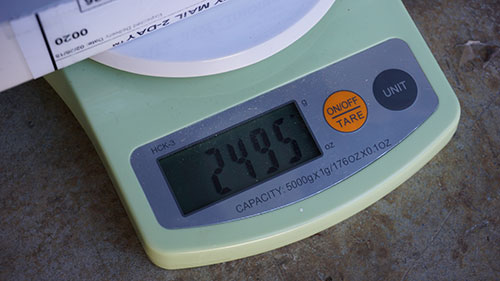
The total AWG with everything as shown here, and that includes a Glacier 5300mah 4s battery is 2495g. I get about 15 minutes of flight and land when my battery reads 14.4v under load.
|