Rough Country UCA & Bilstein 5100 Struts
(date: June 05, 2010)
 Click here to view my gallery! Click here to view my gallery!
After have the NCD leveling kit on my truck for little or a year I finally got tired of the upper arm hitting the coil bucket. Almost every time I go over a speed bump I would always hear the clank from the two contacting each other. Unless I roll over the speed bump very slowly, to the point where a regular sedan would go faster them me, or it will make the clank sound.
I was hoping to get either the NCD or the PRG upper control arms, but count not justify spending over $600 when the Rough Country UCA is only $280 shipped. Plus I do not go off road much, if any. So after reading many forums online about the Rough Country kit, I have yet to find any actually users complain about them too much. I rear a few threads about people speculating that it is a bad kit and not as good compared to PRG and etc. I can see that the PRG UCA his high quality stuff but do I really need something that good?
The bottom line is I just need something that is cost effective and reliable. I have spent thousands of dollars on my previous truck and what happens to most cars as your rack up the miles. Usually most people just sell it and get something new. I had some of the best suspension setup, mods, and etc. on that truck. But in the end most of the money is lost, because the real value is in the car as a whole and not just the mods. Did I really need that dual shock hoop and fancy shocks with remote reservoir for my 20 min commute to work on the freeway? Was it cool to look at, yes. Did it turn heads, yes! Do I really need it, No! Unless you can take off all the mods and put the stock parts back on. Then sell the mods separately it is a lot of money down the drain. I guess this just come with age to think further than just the now. Sorry for the ranting! And back to the upgrade.
So I ended up getting the Rough Country 3 inch Leveling kit that comes with a UCA. Since I had to take the front end apart I thought this would be a great time to upgrade the front struts too. Here is where I spent the most time trying to figure out, what height combination I wanted to do verse ride quality. First of all there are many variation of the Titans out there, it ranges from what year, 2wd, 4wd, off road package, king cab, crew cab, and etc. So it was hard to find the setup on the message forum that was exactly as my truck.
The problem I was having was deciding on what lift combination should I use with the Bilstein 5100 adjustable ride height strut and which spacer. With the Bilstein strut have 3 height setting that you can choose from, 0, 1, or 2. Supposedly with 0 you get no lift and 2 you would get the most lift. But if you use the 2 setting I hear you will get a stiffer and harsh ride. And I also read on the message forums that you will get a slight lift if you use the 0 setting because the shock bodies on the Bilstein’s are slightly longer that stock.
Then the next thing is, should I use my NCD leveling spacer that is 1.25 inch tall or RC spacer that is 1.5 inch tall? Then some people said they use the 1.25 inch spacer and set the shock in the 1 setting. Then some would ask why you are using a spacer when the shock will lift the truck by itself. I think you can see my point where there is many different combination of setting between the different size spacer and shock height. I guess people will choose their setting according to what is important to them. So you want the extra lift of better ride. In my case I wanted the best ride and stop the UCA contact. Ultimately I chose the lowest of all the settings; I used the 1.25 inch spacers and 0 setting on the strut.
This is the results of the 2 different setup I had:
| Stock Specs: |
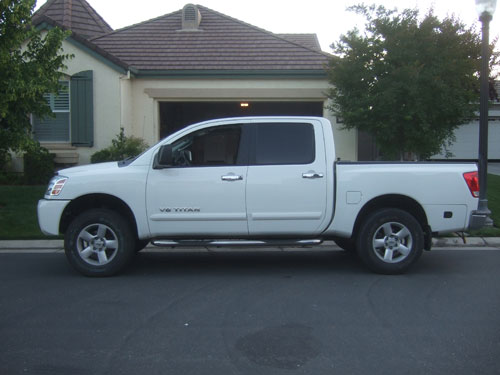
Truck: Titan Crew Cab 4x4 SE
Measured Height (front the ground to bottom of fender) : 36.5 inch |
Lift Kit:
- NCD Leveling Spacer (actual thinkness 1.25 inch thick)
|
Measured Height : 38.5 inch
Actual Lift: 2 inch |
Lift Kit:
- NCD Leveling Spacer (actual thinkness 1.25 inch thick)
- Rough Country UCA (provides NO lift)
- Bilstein 5100 struts at 0 setting
|
Measured Height : 39.5 inch
Actual Lift: 3 inch |
As you can see from the data I have outline above the Bilstein 5100 shocks at the lowest setting will give you a 1 inch lift. And with my existing NCD leveling spacer that will add on an addition 2 more inches, so I got a total of 3 inches of lift and NO upper control arm contact. So for people who wants to go higher you can go about 1 more inch but you might get little to no UCA contact. Even with a 3 inch lift my truck still looks level, and do not need a 1 inch block in the rear. Unless you plan to carry a lot of heavy loads or want the forward rake. My past experience with block lift kits was a major headache in the long run (I was using a 5 inch block). I kept having driving line vibration problems as high speeds, but this was on a different truck (I don’t want to mention what the make of truck it was because people would just say “that is the reason why, it was made by them”). And with a lift block you would get axel wrap too, but you most likely will not have any of the problems I mentioned if you only us a 1 inch block.
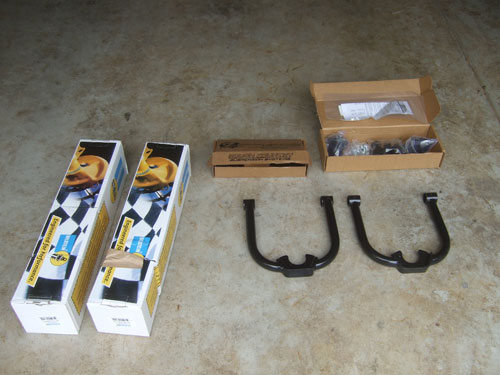
Here is a picture of the everything im about to install: Rough Country 3 inch leveling kit and Bilstein 5100 Struts |
 |
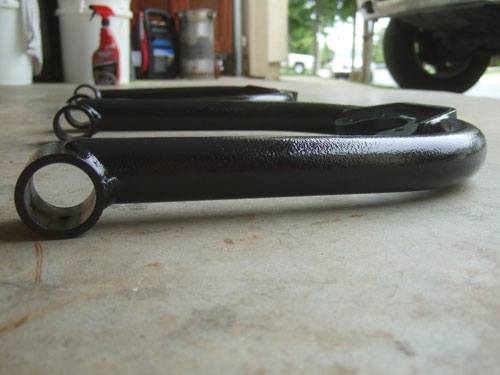
| A close up side view of the RC UCA |
 |
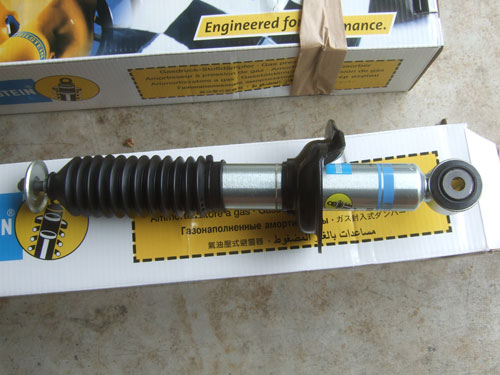
| This is exactly how the Bilstein struts look like when you pull it out of the box |
 |
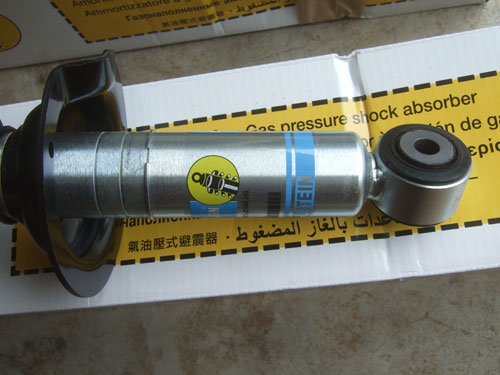
| Can you see the 3 ring grooves on the strut body right below the black thing? Right now it is set at the lowest setting, 0. You can move the ring to get the lift you want. |
 |
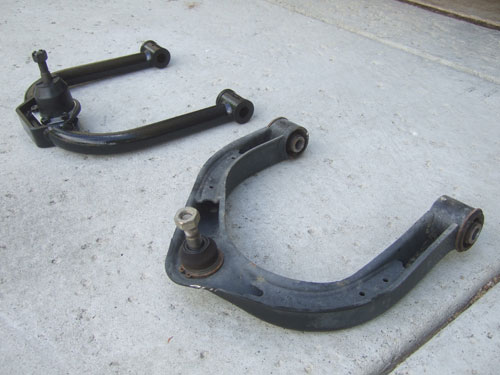
| A comparison shot of the stock UCA in front and RC UCA in back |
 |
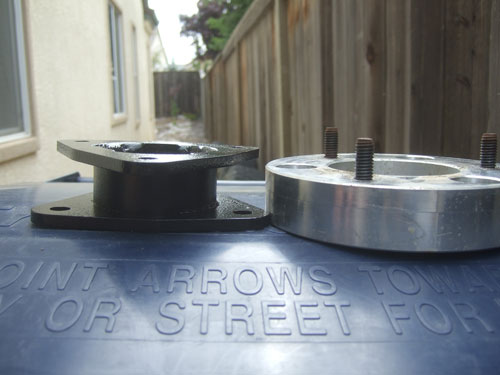
| The RC leveling space on the left is 1/4 inch taller than the NCD spacer on the right. I ended up using the NCD spacer. |
 |
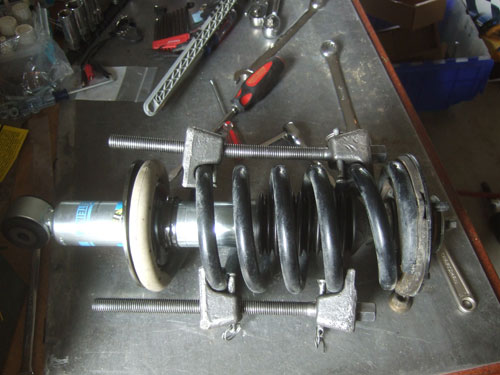
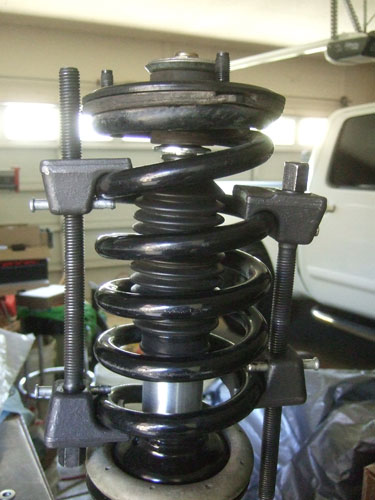
| The scariest part of this whole job was the compressing of the coils. It was not too hard mounting the tool and compression the coil, it was knowing if the coil is compressed enough is what scared me. I do not know if you can tell in the picture, but the large screw on the compression is starting to bend. So it got harder and harder to tighten and I was worried that something will break. And what would happen if I did not compress the coil enough when I try to loosen the nut on top of the strut? In the end everything worked out! |
 |
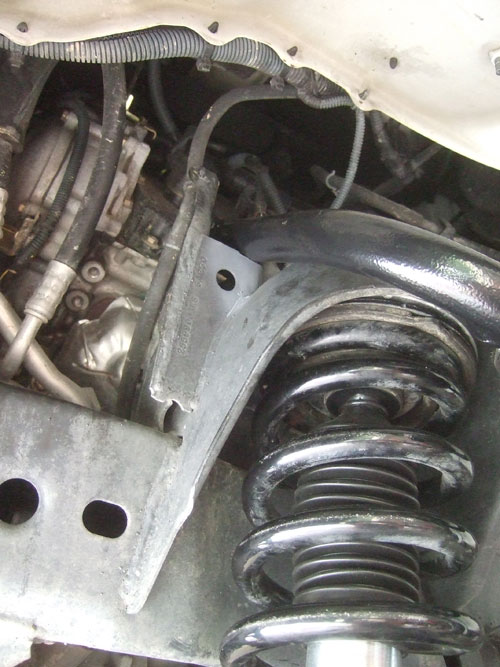
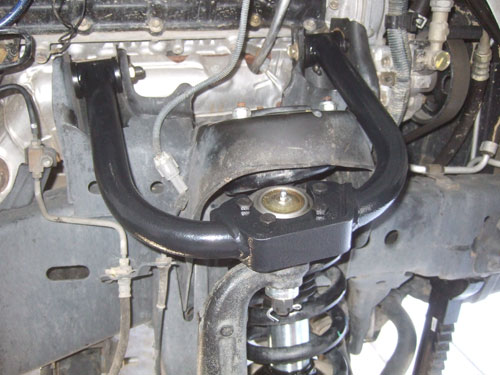
| After mount the UCA I noticed part of the arm still contacts the coil bucket and the bottom of the where the arms are mounted. But this is only when the shocks are fully extended. Unless I plan to catch some air with my truck, it think I will be fine. If you try to get 4 or more inches of lift you might have the UCA contacting the coil bucket still. |
 |
| Here is a view of the RC UCA front the top |
 |
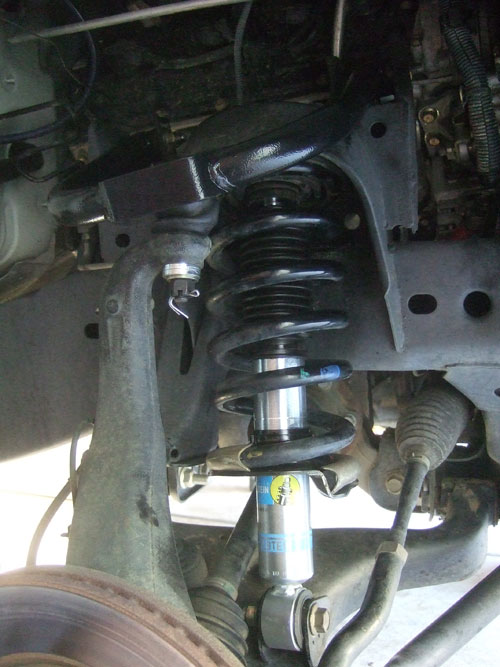
| This is with everything installed with the suspension at full droop. |
 |
| Before the lift (stock height): |
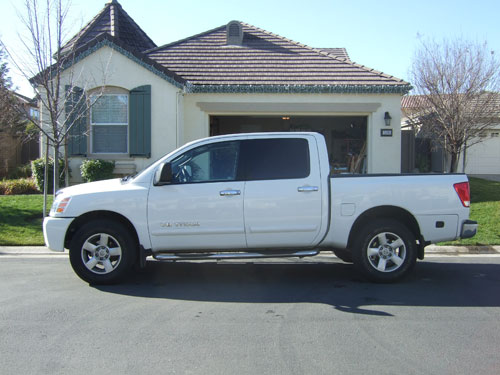 |
| With on the NCD leveling spacer: (actual lift 2 inch) |
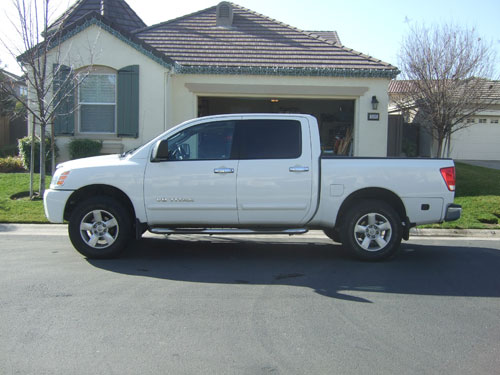 |
| With on the NCD leveling spacer, RC UCA (provides NO lift), Bilstein 5100 strut: (actual lift 3 inch) |
 |
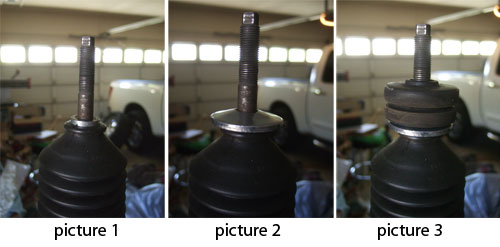
IMPORTANT UPDATE!!!
After driving my truck for about 2000 miles I found out the hard way that I installed my front struts incorrectly. I was lucky nothing was damaged, and I was stranded anywhere when it finally gave out.
Basically I did not install a washer below the coil bucket. And after time the shock shaft punched through the rubber mounts and cause the loud clunking noise every time I went over a bump.
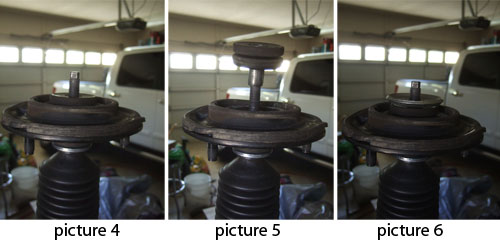
Look at the pictures below for the correct installation with the lower washer in place:
Picture 1: Bare strut shaft
Picture 2: Metal washer i did not install the first time (taken from original struts)
Picture 3: Lower rubber shock ends (taken from original struts)
Picture 4: Top the goes over the coil ( the top is suppose to go the other way around, screw side up)
Picture 5: Upper rubber shock ends with metal bushing (taken from original struts)
Picture 6: Metal washer (taken from original struts) |
|
When you are done it should look something like this (of course you would have to remove the spring compressors): |
|
back to top |